What happened in 2020
2020 is the year where we start building AskAnna. We made the foundation of our platform. The base version is all about helping you kickstart your data science, machine learning, or artificial intelligence project. Next, we highlight some of the stuff we had done or build in 2020.
On a technical level, we set up the backend in Django, the AskAnna CLI using Python, and the frontend with Vue.js. AskAnna embraces REST API. This will also help you to integrate AskAnna with other solutions.
We have introduced a couple of concepts:
- Workspace: here you organize your projects
- Project: a central location for your project code, jobs, variables and runs
- Job: the definition of commands (a job) you want to run in AskAnna, and the output you want to save
- Run: relevant information from the jobs you run in AskAnna
Quick-to-learn: run your job in the cloud within 15 minutes
AskAnna is designed that it should be fast to configure and intuitive to use. You can learn how to configure a project in 5 steps. Check our documentation with the 5 steps to create a project “Hello AskAnna” and end with running a job.
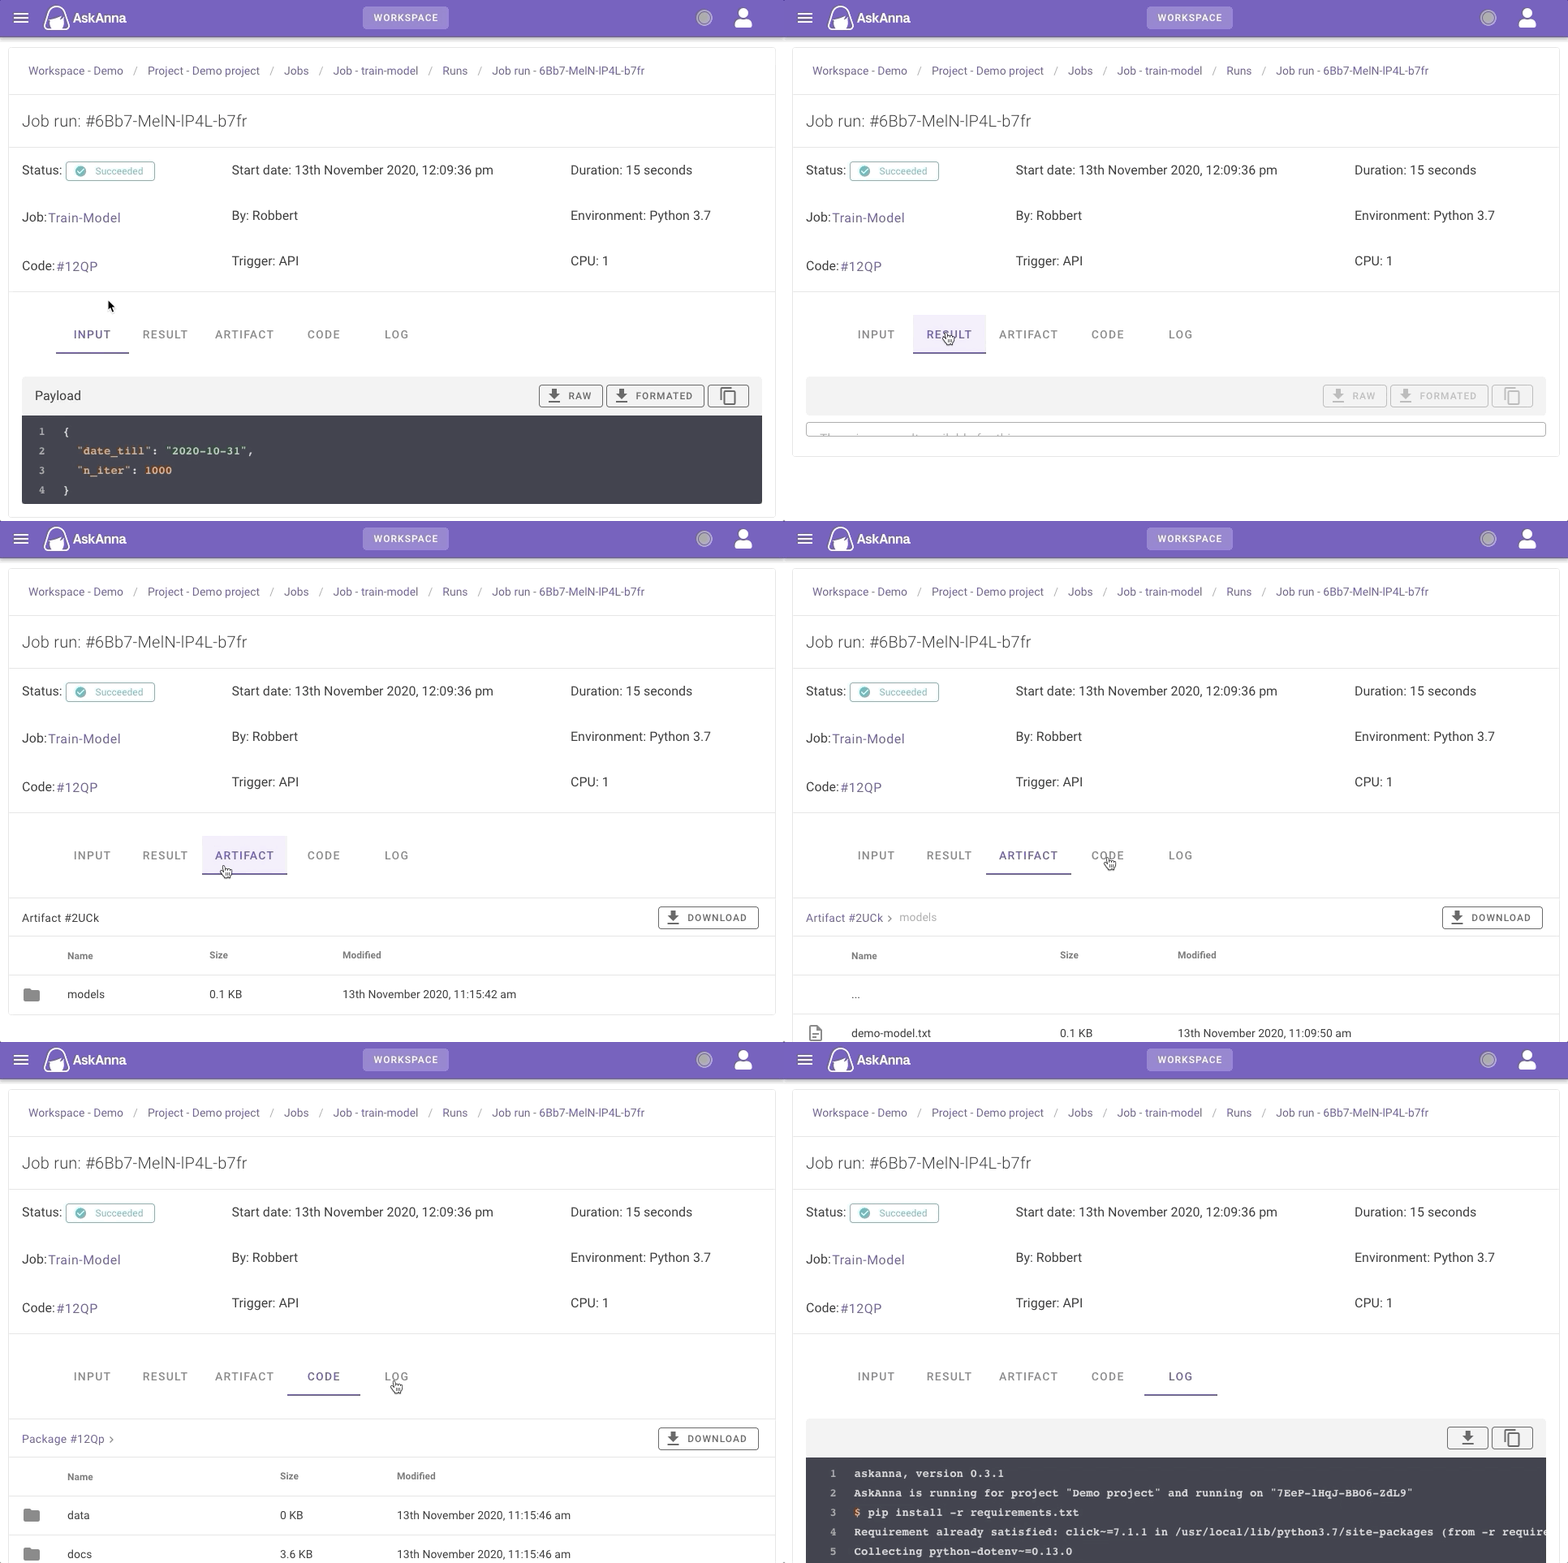
Run page
To be able to reproduce your results, for a generated result you want to know:
- Which input was used
- The result of the job
- Artifacts (in case necessary)
- Version of the code
- Log of the run
That’s why we designed the run page. On this page, you can find all information regarding your job run.

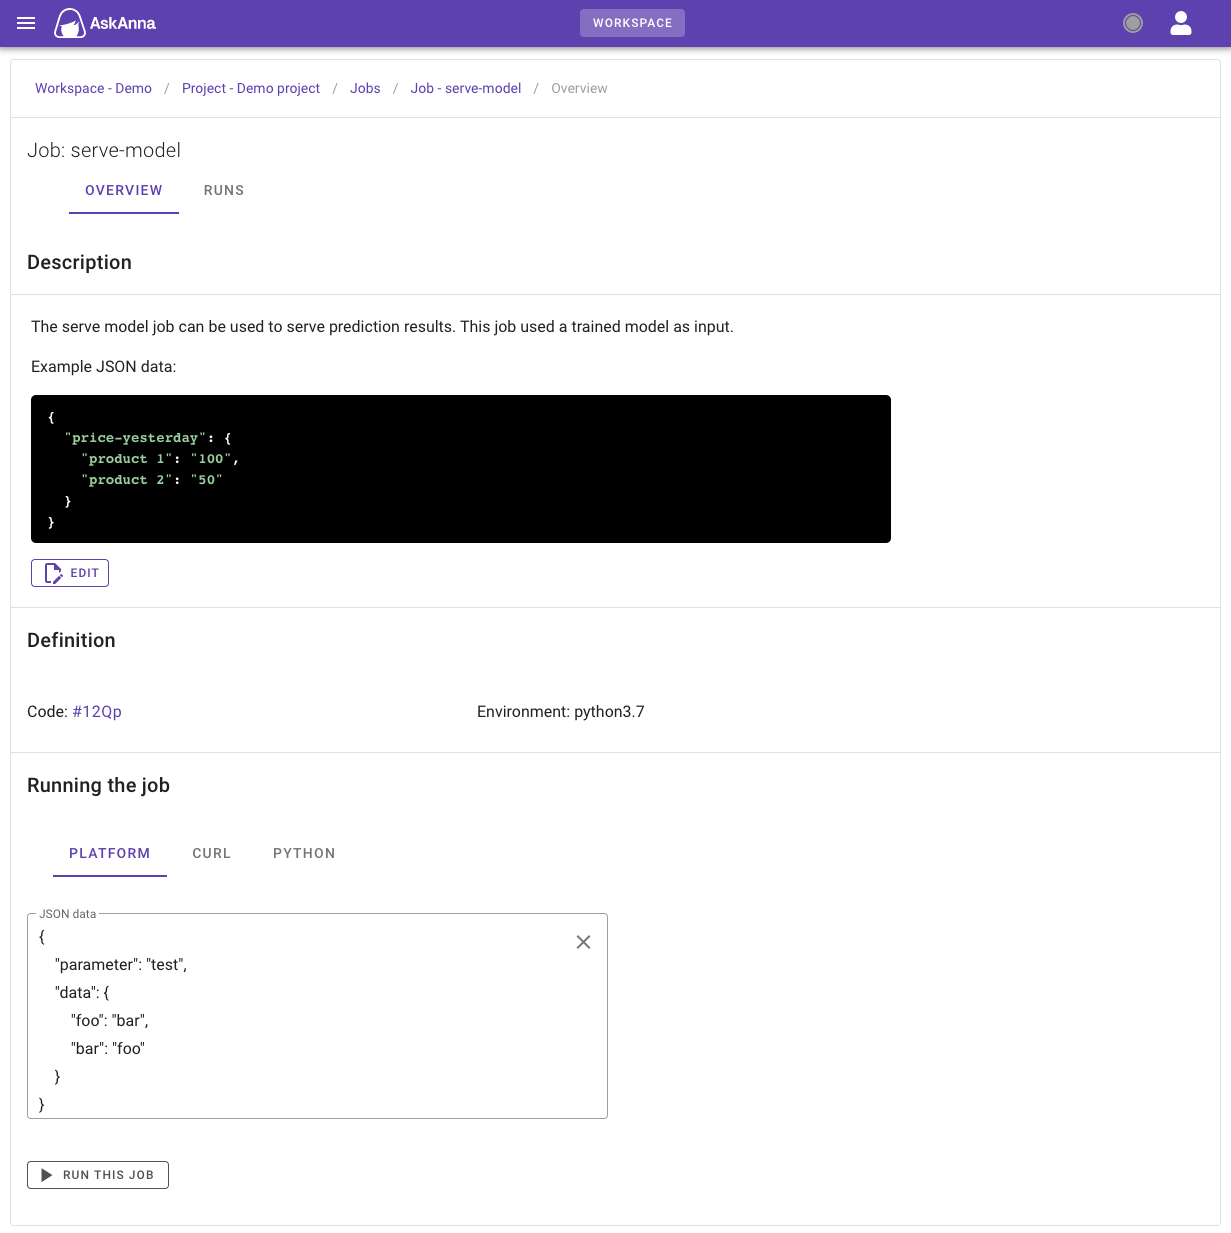
Job page
On the job page, you can find all runs for that job, but there is more. You can also see how you can run the job. No need to look it up in the documentation, but a simple section on the job page. You can trigger a job via the web interface. Also, you can copy the code for Python or curl.

Using environment variables
We want to make it easy for you to develop locally and then run your script in the cloud. One of the concepts we use is based on environment variables. Variables you add to your project will become available as environment variables in the run environment.
For example, you want to set up a PostgreSQL database connection. Locally you add a .env file to your project. Here you specify the variables:
DATABASE_HOST=localhost
DATABASE_USER=postgres
DATABASE_PASSWORD=password
In your Python script, you can set up the connection:
from os import getenv
from dotenv import load_dotenv, find_dotenv
import psycopg2

# find .env automatically by walking up directories until it's found, then
# load the .env entries as environment variables
load_dotenv(find_dotenv())

conn = psycopg2.connect(host=getenv(DATABASE_HOST),
                        database="my_data",
                        user=getenv(DATABASE_USER),
                        password=getenv(DATABASE_PASSWORD))
Locally you can work on your project. You can even use a development, or local database.
When you want to run the job in AskAnna, you can add the variables to your AskAnna project. Now you can run your script in AskAnna, using the variables you have configured. Don’t forget to push the latest version of your code ;)
Read more about using variables in AskAnna.
Use your command line
Sometimes you don’t want to click through a web interface to do the work. You can do the main tasks also using the AskAnna CLI. Some examples:
Create a project
Create a new project in AskAnna, and create a local directory with already the base configuration
askanna.yml.
askanna create "Your new project name"
You can also use a project template:
askanna create "name" -t https://{repo containg the template}
Or create a new project in AskAnna, but use a local directory already containg code for the project:
askanna init "Your new project name"
Push your code
You don’t have to zip your directoy locally. You can also use the CLI to push your code to AskAnna:
askanna push
Run a job
If you run the next command, AskAnna will check the options available for your project. Then AskAnna will ask you some questions so you can start the job you have selected:
askanna run
Jupyter Notebook
As a data scientist, you probably use Jupyter Notebook as well. We want to make it easy for you to view and run your Jupyter Notebooks in AskAnna.
If you want to run your Jupyter Notebook, you can configure a job. If you follow the next configuration example, then the notebook you run in the job is saved as an artifact of the run.
run_my_notebook:
  job:
    - pip install runipy
    - runipy my-notebook.ipynb
  output:
    paths:
      - my-notebook.ipynb
If you want to check the result, you can go to the run page. In the artifact section, open your Jupyter Notebook file. You can view it in the browser and download it for local use or open it in your own Jupyter editor.
Collaborate with as many people as you want
To collaborate, you need to be able to invite others. Inviting someone to join your workspace is a matter of providing the email and click “send invite”. That’s it. If the person you invited already is a member of another workspace, they can use the existing account to join your workspace. Or they can create a new account.
Also, managing the people in your workspace is made simple. If you are done with collaborating, you can remove someone from your workspace. But you can still see the work done in the past.