Using virtual environments for Python packages
When you work with Python, you will often use packages and modules that don’t come as part of the default Python installation. Development goes fast, but you don’t always want to use the latest version of a package. Sometimes you need a specific version of the Python package. The solution for this are virtual environments.
A virtual environment contains a specific installation for a Python version and optionally additional packages you installed. If you use a virtual environment per project, you can control the packages used for that project without changing other projects’ setups. This way, you can try out a new package, or a new version of a package, without interfering existing setups in development.
When you work with Python, we strongly advise using virtual environments in combination with a requirements file. By doing this, you have a recipe for the Python packages needed to run your project. And if you version control the requirements file, you can also follow what you used in the past.
Managing your virtual environments can be a challenge. That’s why we help you set up virtual environments and how you can manage them in this how-to.
The content of using virtual environments:
Install Virtualenvwrapper
When you work on different projects, you want to have an easy way to find, activate and manage virtual environments. Especially when you run many projects. Luckily there are tools available that make this easy.
Mac & Linux
Mac OS and Linux users can work with Virtualenvwrapper.
First, install Virtualenvwrapper. In your terminal you can run:
pip install virtualenvwrapper
When you use your terminal, by default the virtualenvwrapper is not available. You need to add a couple of lines to the
Bash startup file. You can find your Bash startup file in the home directory (~/.bashrc, ~/.profile, ~/.zshrc,
…). Add the next lines to this file:
export WORKON_HOME=$HOME/.virtualenvs
export PROJECT_HOME=$HOME/Projects
source /usr/local/bin/virtualenvwrapper.sh
The WORKON_HOME settings specify in which directory Virtualenvwrapper will organize your virtual environments. It’s
not necessary to change this directory.
The PROJECT_HOME folder can refer to a directory you use by defaul for your projects. I always use a directory
Projects in my home directory. You can change this to your default directory.
On Mac OS Python 2.7 is pre-installed. If you installed Python with these instructions, you probably want to use a Python 3.x version. You might need to inform Virtualenvwrapper which Python version to operate on. If the default is not working for you, you can add a line to your Bash startup file that specifcy which Python binary Virtualenvwrapper should use by default. Add the line before the line where you source Virtualenvwrapper. An example for Python 3.9 on Mac OS:
export VIRTUALENVWRAPPER_PYTHON=/Library/Frameworks/Python.framework/Versions/3.9/bin/python3
Windows
If you are running Windows, the default Virtualenvwrapper will not work. For the regular command prompt, you can use Virtualenvwrapper-win. To install, you can run the next command in the Windows command prompt:
pip install virtualenvwrapper-win
Using Virtualenvwrapper
Now you have installed and configured Virtualenvwrapper, it’s time to use it. In your terminal you can run commands to create, (de)activate, list and remove virtual environments. Next, we will show you how this works.
Create a virtual environment
There are two ways you can create a virtual environment. If you only want to create a virtual environment, you can run
mkvirtualenv with the name you want to give your virtual environment. You can use the name later for listing and
switching between virtual environments.
mkvirtualenv name_of_the_environment
If you start working on a project from scratch, you can also create a virtual environment and a new project directory using one command. The new project directory is created on the location PROJECT_HOME that you configured in the installation step. The name you provide will also become the name of the virtual environment.
mkproject name_of_the_project
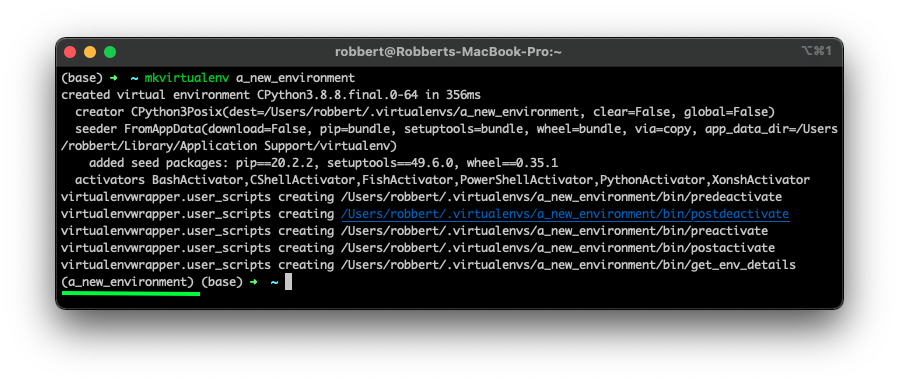
When you create a new virtual environment, Virtualenvwrapper will automatically activate it. In your terminal, you can see this because the name of the virtual environment appears. See also the last line in the screenshot:
Install packages
Now you have successfully created a virtual environment. Next, you can install packages. You can install most packages
using pip. By default this will install packages available on PyPi. If you want to install
AskAnna, you can run:
pip install askanna
Using a requirements file
In most projects you want to store which packages you have installed, especially when you work in a team. You can add a
requirements.txt file to your project. Each line contains a package you want to install. You can also specify which
version of the package you want to install. You can see this file as a recipe for the Python packages needed to run
your project.
For example, if you want to install the latest version of AskAnna and
SciKit learn version 0.24.1, you should add the next lines to your
requirements.txt file:
askanna
scikit-learn==0.24.1
Instead of installing packages directly via pip, you can also install the packages using the requirements.txt file.
To do this, you can run the next command from the directory where you save the requirements.txt file:
pip install -r requirements.txt
If you want to create a new virtual environment and directly want to setup your packages you can also run:
mkvirtualenv NAME -r requirements.txt
Activate and deactivate a virtual environment
If you want to activate a virtual environment, you can use the command workon with the name of the virtual
environment:
workon NAME
When you are working on an active environment, you can deactivate it by running deactivate. When you deactivate
the environment, it’s like logging out. The next time you want to continue working, you can login using the
command workon. When you deactivate a virtual environment, you go back to your system environment.
deactivate
List virtual environments
When you want to know which virtual environments are created using Virtualenvwrapper, you can run lsvirtualenv. You
will get a list of virtual environment names.
lsvirtualenv
Remove a virtual environment
Removing a virtual environment is as simple as creating it. Run rmvirtualenv with the name of the virtual
environment, and you will remove it:
rmvirtualenv NAME